
Call 423-502-8148 for dead animal removal in the tricities area
This is how we do it. See how a dead opossum is removed from a clients home in Elizabethton Tn.
Dead Animal Removal
If you have wildlife in your home then you could soon have dead wildlife in your home. I cant tell you how often I have to deal with dead squirrels in the wall, dead opossums under house trailers, dead animals in the attic, a mysterious dead animal smell, etc. Maybe it is so bad that you can’t sleep. I have met plenty of people who were in that situation. If this is your circumstance, I hope that this article helps.
What Type of Dead Animal Am I Dealing With?
People who have “critters” in their homes eventually are likely to have to deal with a dead animal. Knowing what animal you had will help you know something about where the carcass is likely to be located. Here are some thoughts to help you:
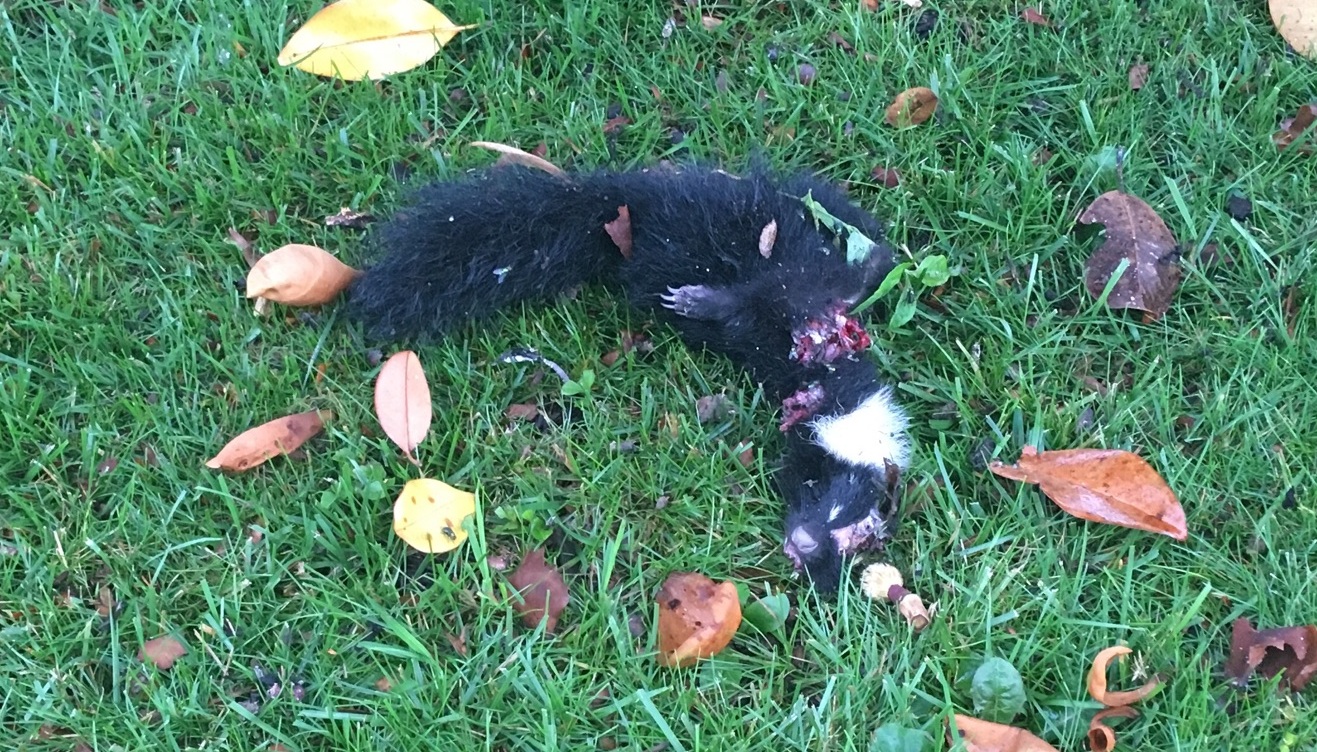
Skunk carcass found in Johnson City clients yard. This carcass was fairly intact and had not decayed much at this point. This was a juvenile skunk and momma was still in the neighborhood with the rest of her litter.
1) Some homeowners see or hear squirrels in the attic and leave the problem unattended. Later a terrible stench reaches their noses. There is a good chance that is the classic “dead squirrel in the wall smell”. Squirrels tend to stay in the upper half of the house so good options to check are walls and ceilings. Often the squirrel finds an opening at the head of the wall that allows the animal to fall inside the wall trapping it.
2) If a rodenticide has been left out to kill rats, they tend to stay in the crawlspace. Retrieving a dead rat is not impossible, but dead rats can be hard to find. They could be anywhere in the crawlspace, even in a tight nook or cranny that you can’t reach. Hopefully you won’t have to invest in some “rat odor remover” and leave the carcass in place. If you do, we have several odor neutralizing products that can help.
3) If there have been raccoons in the attic something bad may happen to mom while she is out foraging and the kits may die. If this is the case then you have “dead raccoon in the attic” stink which can be a much bigger problem than you would if you had something like a dead mouse in the wall. Each baby may weigh a pound or two and there are going to be three or four dead babies up there. That is a lot of carcass to stink up the house.
Finding the Dead Animal
Once we arrive, the first order of business is to find the source of the stink. In many cases, this may be the greatest challenge that you face in removing the dead animal. Generally speaking, the animal will be in the stinkiest part of the house - this seems obvious. But, beyond that it starts to get more complicated. Here are a few things that might help you:
1) If you heard persistent, desperate scratching inside the wall near the floor you may have a trapped animal inside the wall. You may want to call a professional to remove the animal before it dies. This will save you the stench associated with a carcass.
2) While it is still scratching, it might be a good idea to mark the spot on the wall where you hear it. Once it dies, it will be harder to locate. A few inches one way or the other count a lot in this case. You are likely to have to cut through the wall. If you miss and open up the wrong section of wall, you will have to cut again. You may end up with two holes to patch instead of one.
3) Watch for flies because they are excellent at locating “stink” and will swarm near the carcass. Following the fly will not always take you directly to the carcass but, it will get you in the general area.
4) If the carcass is overhead in the ceiling, that is good and bad news. Maggots may drop through into your home. If they do, this will give you a good idea of the carcasses location. If it is in the ceiling, you stand a good chance of being able to scoop the carcass. Crawling through an attic carries its own list of risks. You can fall through the ceiling s you may or may not want to do this yourself if you are not accustomed to crawling through attics spaces.
5) If the carcass is large enough, there may be a “juicy spot” or stain to indicate its presence. If it is in the ceiling, the stain may become evident.
6) As the carcass decomposes, it may create a hot or cold spot. This can be helpful when searching under house trailers. The only thing between you and the dead animal is a piece of fabric. You may also see maggots coming through the fabric.
Trapped Animals That Die in the Wall or Ceiling
Animals, usually small ones, will become trapped inside a wall or other parts of the house. Pitfall traps are sometimes accidentally engineered into homes. This happens when there is some type of cavity inside the home where an animal falls or climbs and can’t get back out. Usually these spaces are created inside a wall. Walls in modern homes are built with two layers of drywall or siding with a framework of 2x4s sandwiched In between. If there is an opening at the head of the wall, then a small animal can enter the cavity. The insides of the cavity are made of paper and smooth wood. Neither of these materials have enough texture for the animal to get a grip and climb back out. Some walls inside homes are insulated and others are not. If the animal is small, like a mouse, then they will be able to climb back up on the insulation. If not, then it is stuck there.

These baby squirrels were removed from an attic in Greeneville Tn. to be reunited with momma. Failure to remove the litter results in an inhumane death and carcasses left inside the home.
Trapping Momma and Leaving the Litter
Trapping a litter’s mom living in your home is a sure fire way to get yourself dead animals in your house. I mention this because some people who are dealing with a dead critter in the attic may have just relocated momma about a week ago and are realizing that they have problems. I can remember one home in Grey Tn. that had this exact problem. I was called because of the dead squirrel in the wall. In the end I had to not only deal with the dead squirrel in the wall but also figure out how to keep the other squirrels out of the house.
Taking momma away guarantees that the litter will die. As they get hungrier, they start to cry. This is a sad situation. You definitely want to avoid this, but it can be hard. First, your need to know if you are in denning season. If you are anywhere close to denning season assume that there are babies. I have my own “get momma to move the family” process that I use to avoid this problem. If you have a litter stuck in the wall, you may have to cut a hole in your wall.
Tool List for Retrieving the Carcass
Now we enter the fun part. That was sarcasm, if you hadn’t guessed. The first thing you will need for this job is a strong stomach. If you gag when someone is changing a baby diaper, this is not the job for you. I do have a few items that I carry on the truck to help me with this type of work. If you end up tearing a hole in something and need to make a repair, the list will get a little longer. This is my short list:

Technician in white hazmat suit preparing to crawl under Johnson City home to retrieve carcass.
1) A respirator with a carbon cartridge is mandatory. The carbon will help remove some of the stench. The filter will also remove any hazardous particles from the air that you might encounter. Fiberglass insulation particles are one big one that I worry about. The warnings on the wrapper mention cancer. That makes me nervous.
2) A white hazmat suit is nice. If you crawl through the filth, you don’t want it on your clothes. You don’t want to wear that stuff around and cross contaminate yourself.
3) A couple of trash bags. Don’t go crawling into a hole looking for a carcass and then have to crawl back out for the bag.
4) Flash light and head lamp. These are obvious choices. You can’t peep into a dark hole looking for a carcass without a flashlight.
5) A small shovel is handy if you anticipate having to scrape the animal up.
6) Rubber gloves are mandatory. You don’t want to have to touch that nasty thing directly.
Condition of the Carcass – What am I Going to Have to Deal With
What shape the carcass is in may help you decide whether or not to tackle this job on your own. I have seen the full range of carcass conditions. They can be little dried critter mummies, wet juicy and writhing with maggots, or look just like the critter just took a nap. Usually the “just took a nap” conditions passes quickly, generally within a day or two. If you have smelled the carcass, it definitely won’t look like it is taking a nap. It will be a lot more like “Halloween Haunted House horrible”. If things are far enough along, some parts may separate from the main carcass. Bugs can start showing up to lay eggs on the carcass in a matter of minutes. More on bugs in a little bit.
Environmental conditions make all the difference. Temperature is the main driver determining the speed of decomposition. If the temperature is too low, bugs are slow to show up and speed the decomposition process. Extremely low temperatures will halt the process and delay decomposition until temperatures rise. This means that the odor stench and insects will be waiting for you down the road. If temperature is too high, that too may affect insect activity and slow the process. Dry conditions are more likely to encourage mummification. But, even in a hot dry attic, there will be a soupy maggot stage.
Rainfall is a secondary factor governing carcass decomposition. Heavy rainfall can wash away some of the insect life slowing decomposition. Extremely dry conditions can dry up the soup faster and make it harder for maggots to do their job. Normally inside houses rainfall is not an issue. If the carcass is in an attic in the summer, it will be very dry. This will probably increase the odds that the decomposition process will be cut short and that you will have a “critter mummy”.
How Long Will a Dead Animal Stink?
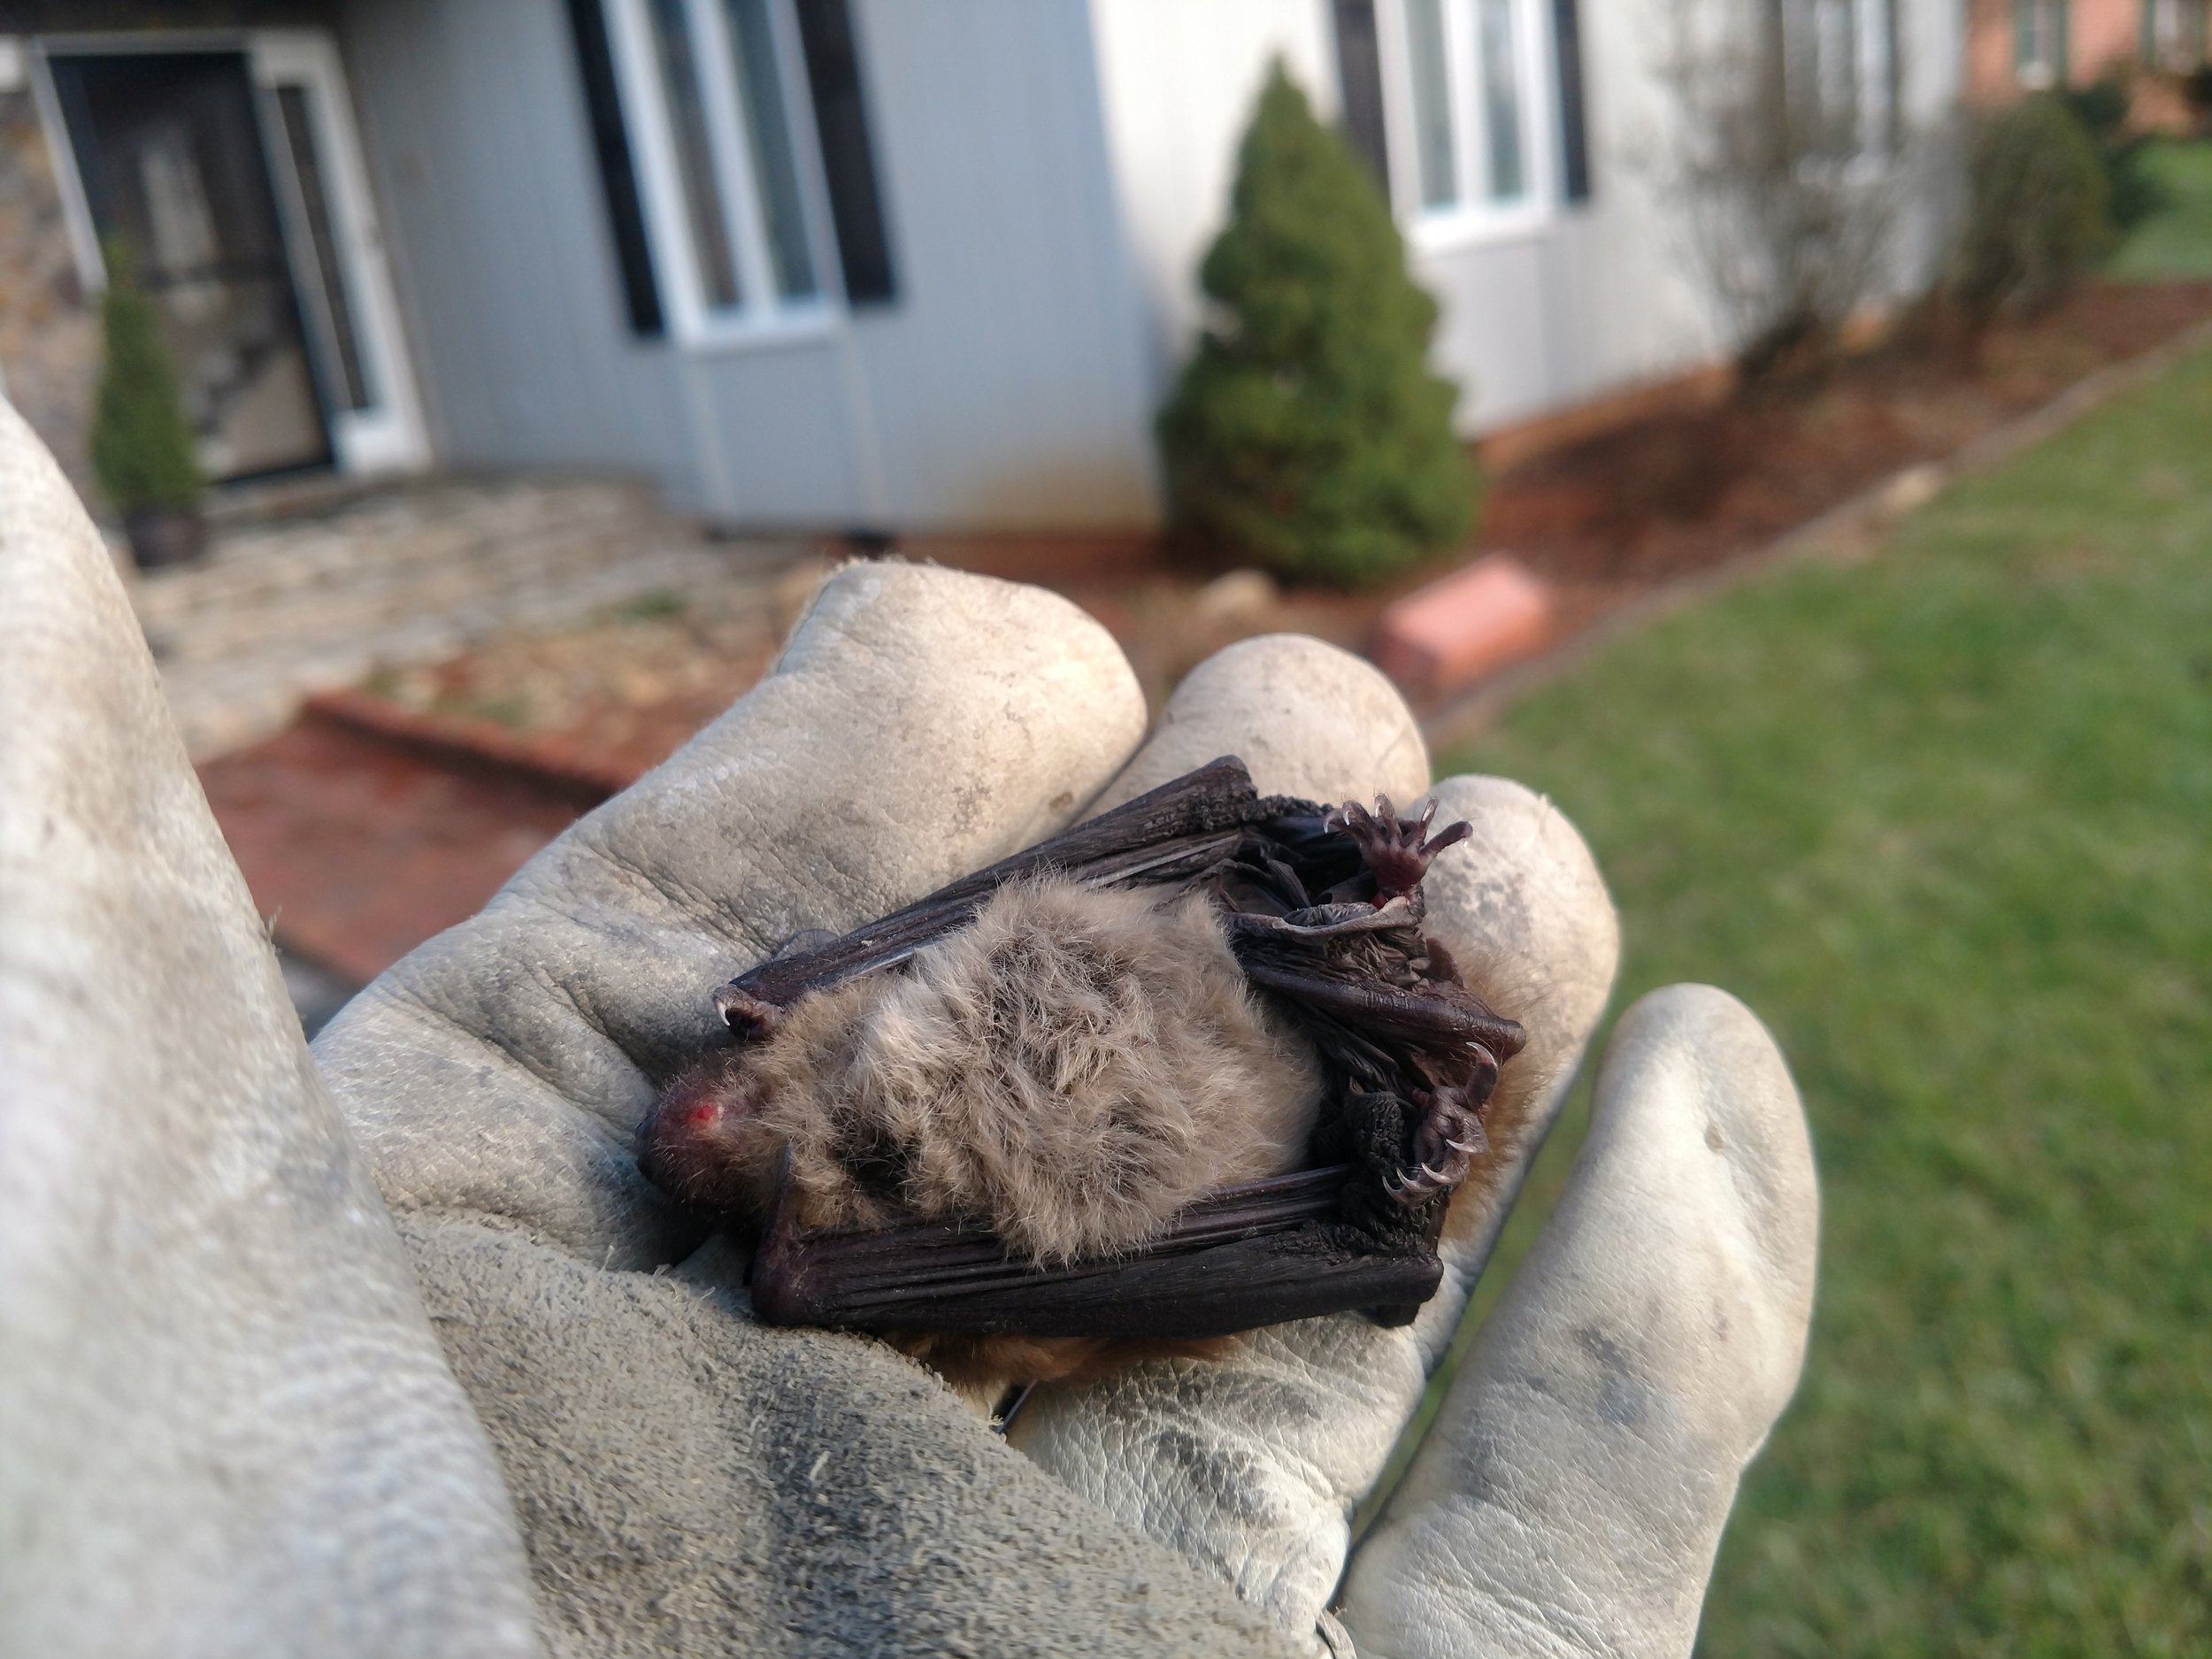
This bat was found in a Bristol Tn. home. Dead bats are common inside attics where bat colonies take up residence. A small animal like this is less likely to stink, but sealing an entire colony inside the attic with improper removal techniques would be a different matter.
This depends a lot on how big the animal was and what the temperatures are. Small animals dry up quicker than big ones. Usually for small to mid-sized animals I can still smell an odor for a couple of weeks with normal summer temperatures. I think that the stink tends to return occasionally after that with changing weather. As mentioned earlier, environmental factors and insects drive decomposition speed. The insects are also good indicators of the progression of carcass decomposition.
I personally think that a dead animal stinks worse inside than outside. That may seem silly. Why would the animal smell worse inside? Well, I don’t think that the animal smells worse, it is just that the odor can be very concentrated indoors. I meet plenty of people with watering eyes and a lack of sleep who will attest to this fact.
Popping Carcasses
Keep in mind that carcasses do inflate with some pretty nasty gasses. As this happens, the skin becomes taut and the legs may stick out in some pretty unnatural angles. Beware! Disturbing a pressurized carcass can cause it to pop. It will not fly around the room like in the cartoons, but the effect can be disturbing and you sure wouldn’t want the thing to splurt itself on you!
Carcass Insects
Blow flies are the first to show up. Those are the pretty flies with the shiny bright green backs and blue eyes. I have seen blow flies show up on a carcass in less than ten minutes. (I guess word spreads fast.) Usually, eggs will be laid around the mouth, eyes, anus, and some in the ears. Eggs look like small white grains of sand. If you just noticed the first fly and things don’t stink much, you may be in luck. The carcass may still be intact. Maggots have more of a liquid diet. They prefer the “soupy gooey” early stages of decomposition.
After that, you will start to see carrion beetles. There are several species of carrion beetles. The ones that first come to my mind look like large lightning bugs. Proportionally, they are much wider than lightning bugs and the will come crawling out if you disturb the carcass. They have chewing mouthparts that can handle tougher foods. They will also feed on some of the maggots that are already there. I guess that is good news. If you are seeing Carrion Beetles I think that you are probably on the back side of the decomposition process.
Let’s Not Repeat this Catastrophe - A Word on Prevention
A word to the wise – permanently seal the critter out before it is too late. I can’t tell you how many homes I gone into that have critter signs that has accumulated for years and owners had no idea that something was going on until something bad happened. This is good advice for anyone. Once you have gotten through locating and cleaning up the carcass, it will be time to focus on prevention. Here are a few tips:
1) Don’t use rodenticide. Rats and mice WILL die in your house and you will eventually have that dead rodent odor return. That thing about rodents going outside to seek water that the pest control guys tell you is a load of garbage. Some may go outside, but there is no guarantee. I have been under houses and found both rodent skeletons and plastic trays that held the poison pellets under the same house. I think that tells the story. There is more than enough water to take care of a rodents needs under a house. There is plenty of slow drips from pipes, condensation on AC lines, and water seepage under foundations. How much water does a mouse or rat really need? Plus who, if they are dying from poison, is really able to pick the spot where they will die?
2) Past events are the best predictor of the future. Seal up all entrances where critters can come in!! I can’t stress this enough. If the animals can’t get in then, they can’t die in your home. For squirrels, raccoons, bats, and other climbing animals, this means sealing and hardening around the roofline down to about 3’ above the ground. For “on the ground” animals, this means sealing and hardening around the foundations up to about 4’. I know that there is a one foot overlap between the “down to 3” and “up to 4”, but that is what the professional literature recommends.
3) Be thorough when you seal up. Sealing only one hole and leaving others is a waste of time. In fact, sealing one and leaving “soft spots” is a waste of time. If there is a hole in one foundation vent, then you need to check all the foundation vents. The same goes for architectural points on the roofline that repeat themselves around the house. Remember that critters often consider your home their home and they will work to get in. It pays to have experience in this area. The first time that you do this type of work, you will probably miss a few spots.
4) If you live in a mobile home, upgrade the underpinning. If you want to keep wildlife out from under a building, then it has to have a barrier under it that extends into the ground. Standard foundations serve this purpose for brick and mortar homes. Underpinning usually needs some “beefing up” to be secure. This will mean some trenching and possibly adding screen wire (hardware cloth) to the back side of the underpinning. Part of the screen wire needs to be buried in the trench with the part of the wire in the trench turned away from the building. The trench/hardware cloth set up needs to go all the way around the home. If this is too expensive, then I would at least consider securing tears in the cloth that cover the bottom of the trailer. At least the animals won’t be able to just hop in.
5) Have your home inspected for wildlife infestations. Nobody does, but everybody should. It costs a lot less than an animal cleanup would. A word to the wise – permanently seal the critter out before it is too late. Even better, have your home inspected once in a while to make sure that you don’t have any unwanted visitors. I can’t tell you how many homes I go to visit that have “critter signs” that has accumulated for years. Home owners have no idea that something has been going on until something bad happens. This is good advice for anyone, but if you are reading this, it is probably too late to do that.
6) Removing the insulation from an attic, cleaning the attic, and reinsulating the attic could cost several thousand dollars. I don’t do this type of work right now, but I hear figures that run around $5,000 regularly. Having an inspection will keep you from having to search “dead opossum removal’ on your phone.
7) Screen under your outbuildings and decks for homeowner protection. These are excellent places for wildlife to hide and, at some point, die. Screening not only keeps animals from damaging the structure, but also eliminates the chances of a carcass showing up there.